はじめに
Windows Server のActive Directoryを使用した検証などを行うため、試用版のWindows Server 2019を構築します。なお、試用版にはライセンス認証タイマーという180日の有効期限がありますが、ライセンス認証タイマーリセットコマンドが用意されており、最大6回までリセットが可能です。
検証環境
Windows Server 2019は、Hyper-V上の仮想マシンにインストールします。
| 物理環境 | OS | Windows 11 Pro (22H2) |
| Hype-V | 10.0.22621.1 | |
| 仮想環境 | OS | Windows Server 2019 |
| ホスト名 | win2019-01 | |
| IPアドレス | 192.168.0.10 | |
| サブネットマスク | 255.255.255.0(/24) | |
| デフォルトゲートウェイ | 192.168.0.1 | |
| 参照先DNSサーバ | 192.168.0.1 |
作業内容
Windows Server 2019(評価版)のダウンロード
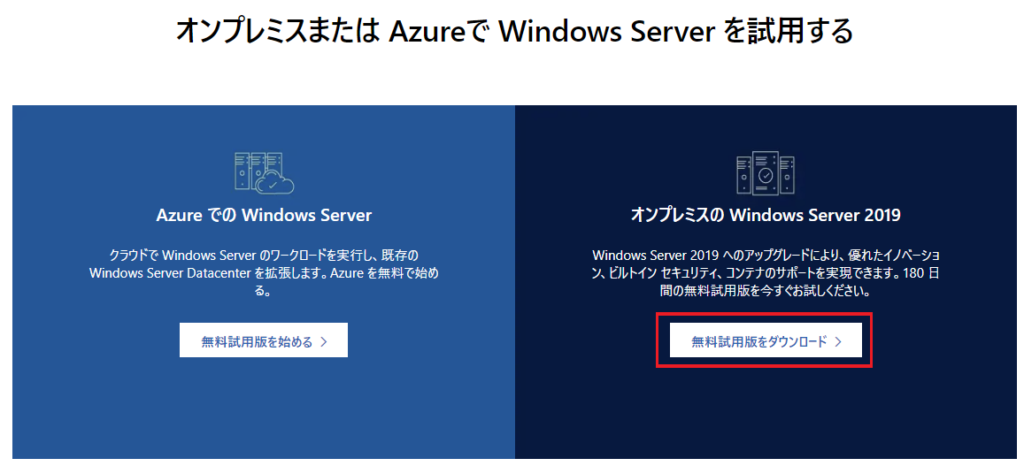
(1) Microsoftのサイトより、オンプレミスのWindows Server 2019の[無料試用版をダウンロード]をクリックします。
[公式]ダウンロードサイト
(2) [ISOをダウンロード]をクリックします。

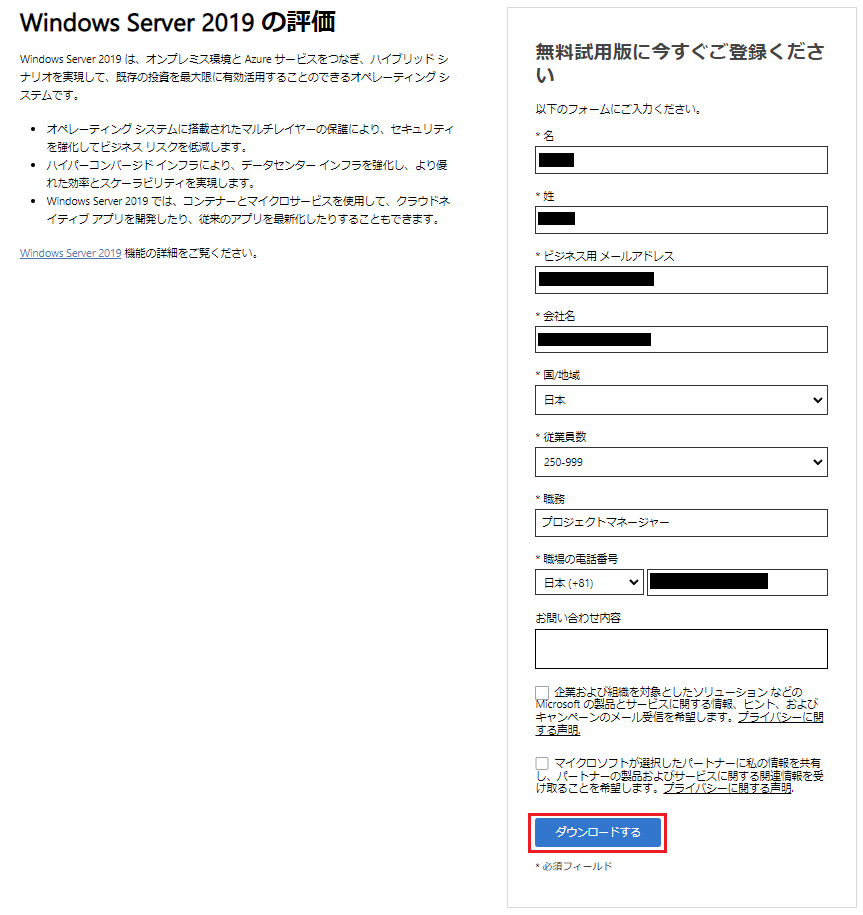
(3) 必須項目(*)を全て記入して、[ダウンロードする]をクリックします。
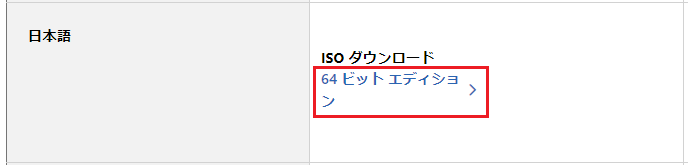
(4) 日本語のISOダウンロードの[64ビット エディション]をクリックします。
Windows Server 2019(評価版)のインストール
(1) Hyper-Vの仮想マシンにインストールメディアを挿入して、仮想マシンを起動します。
※仮想マシンの設定は、割愛
(2) Windowsセットアップ画面で[次へ]をクリックします。

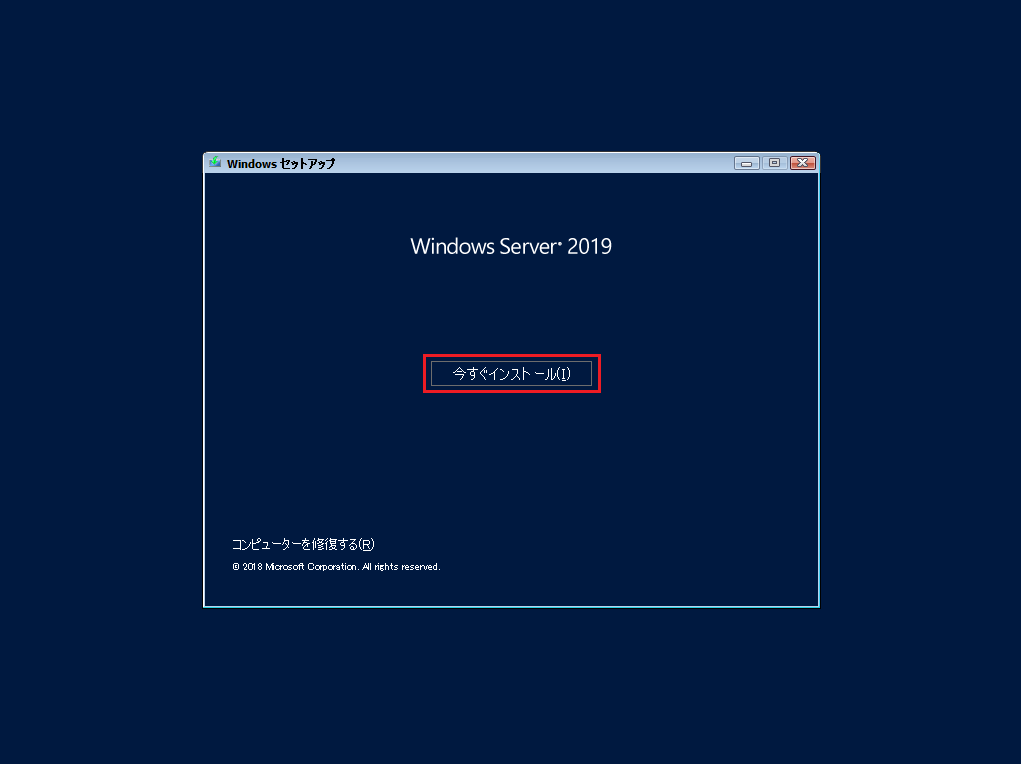
(3) [今すぐインストール]をクリックします。
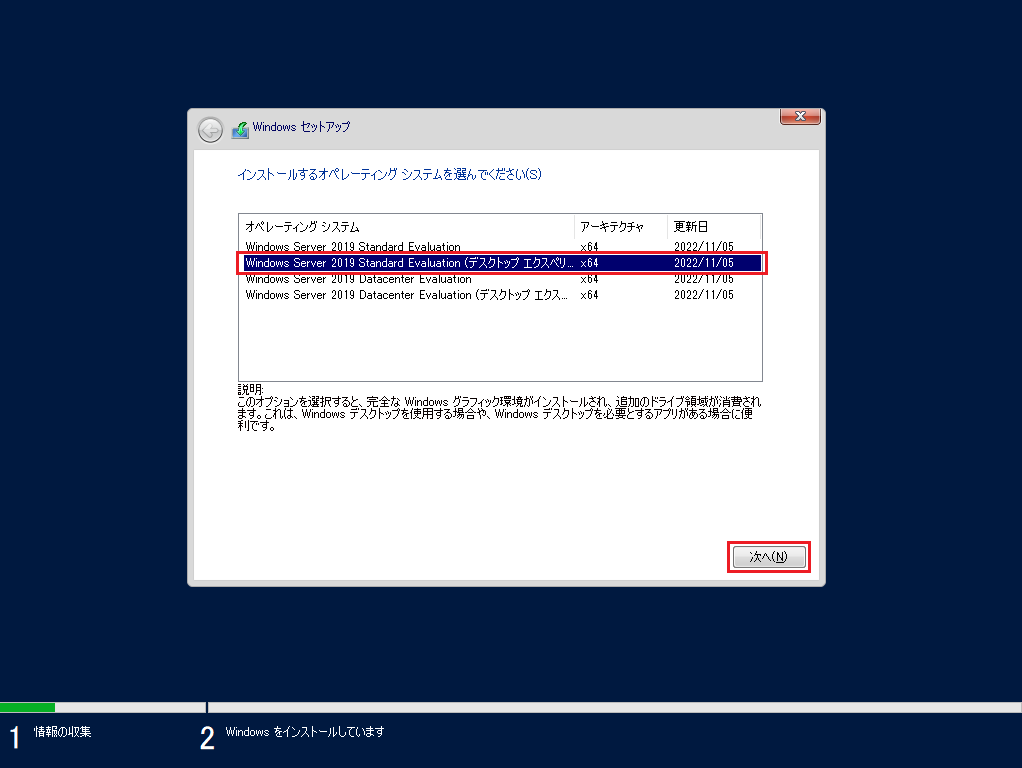
(4) [Windwos Server 2019 Standard Evaluation(デスクトップエクスペリエンス)]を選択して、[次へ]をクリックします。
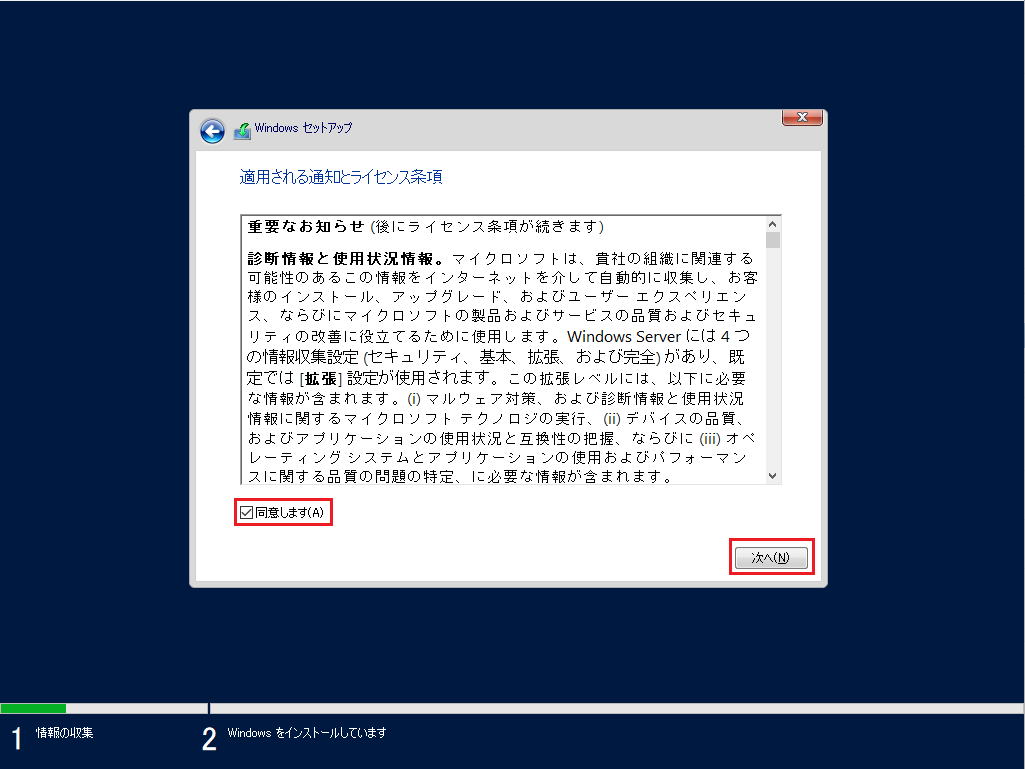
(5) 重要なお知らせを確認し、[同意します]にチェックを入れて[次へ]をクリックします。
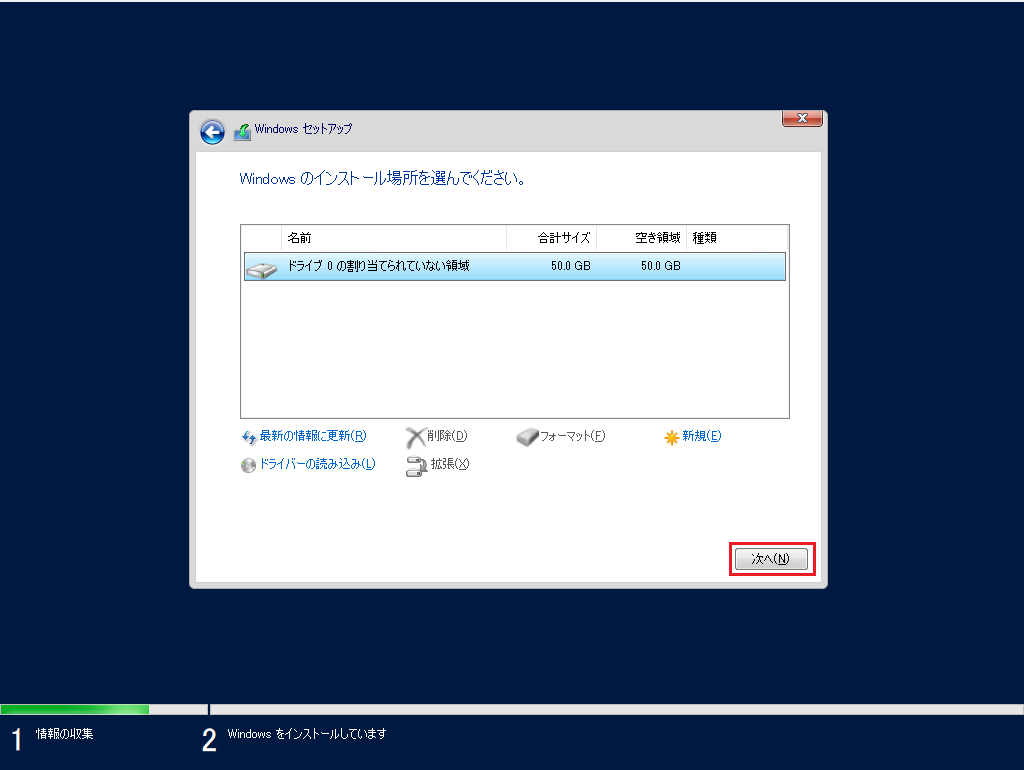
(6) [カスタム: Windows のみをインストール(詳細設定)]を選択します。
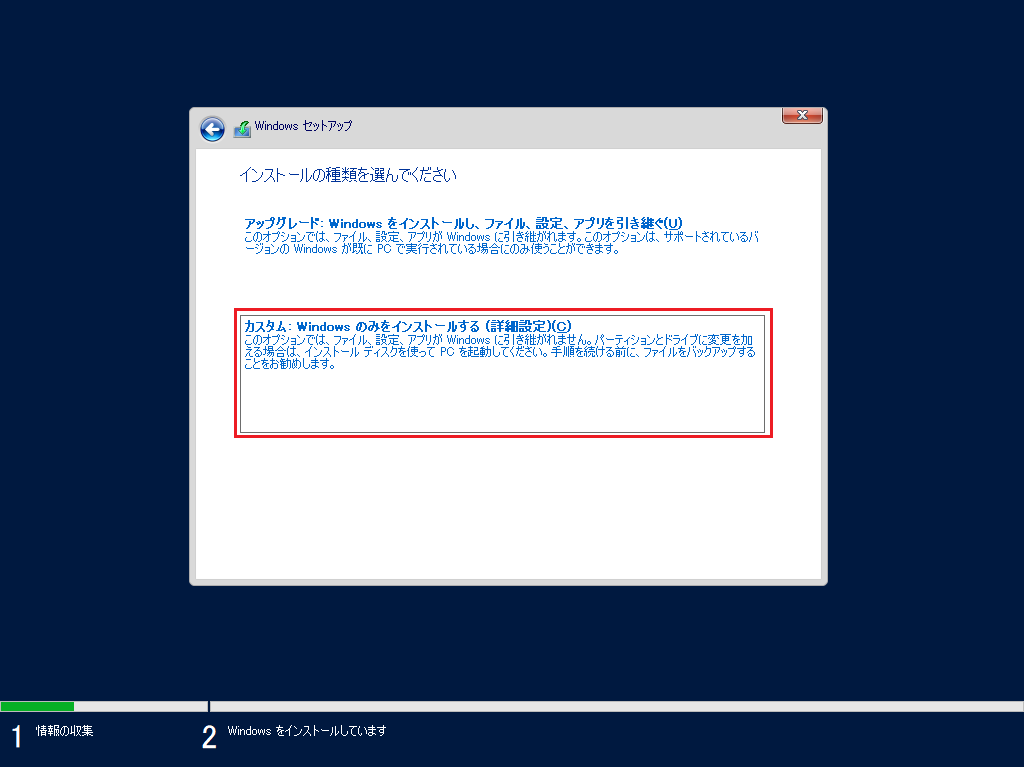
(7) [次へ]をクリックします。
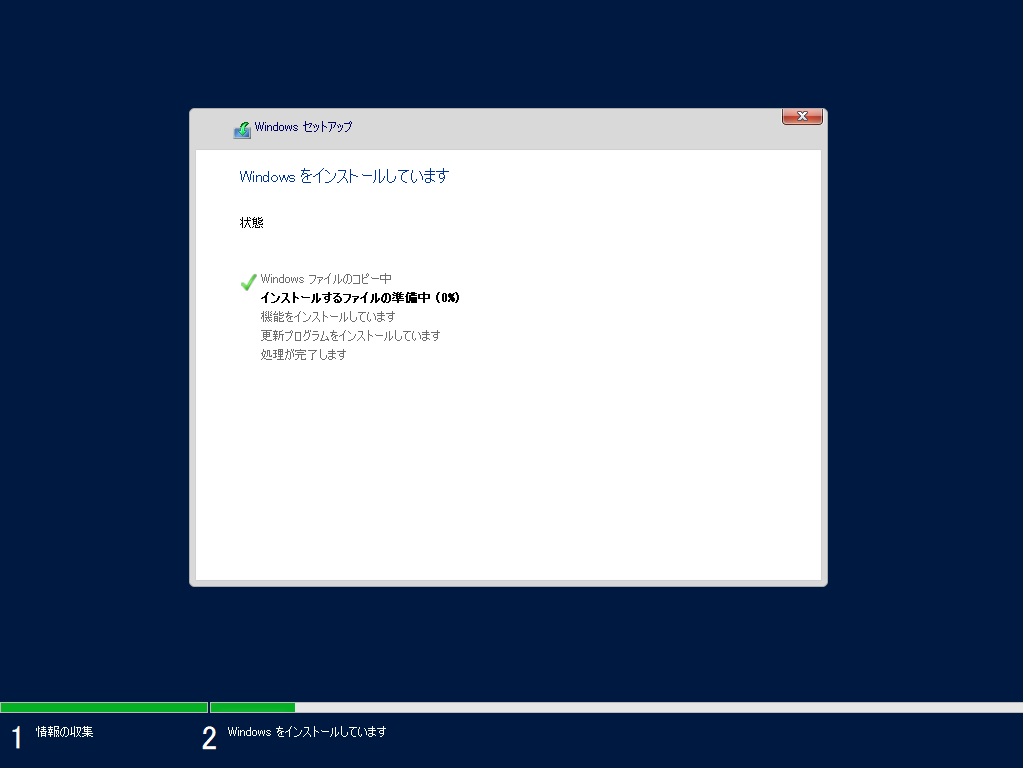
(8) インストールが完了するのを待ちます。
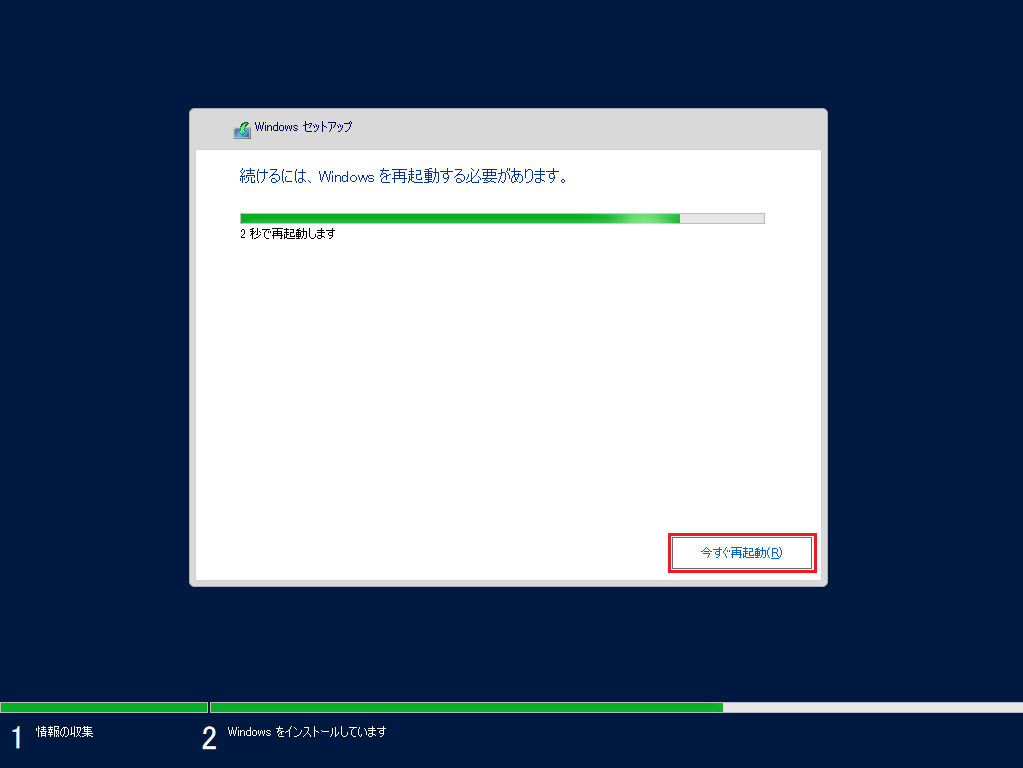
(9) インストール完了後、[今すぐ再起動]をクリックします。
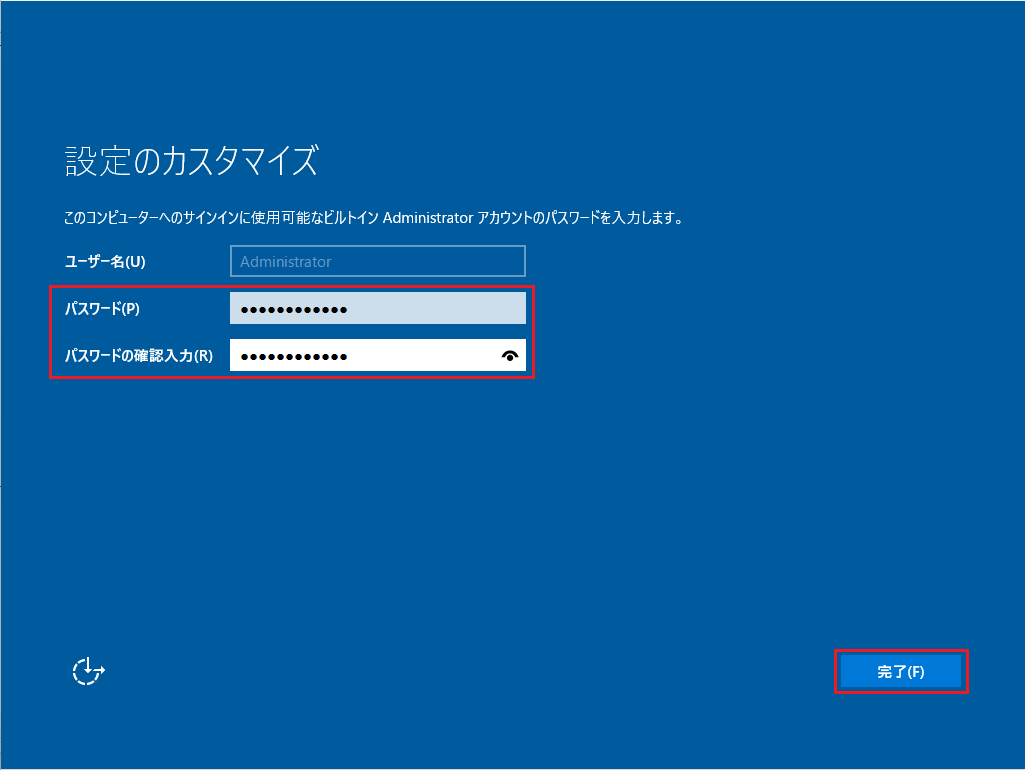
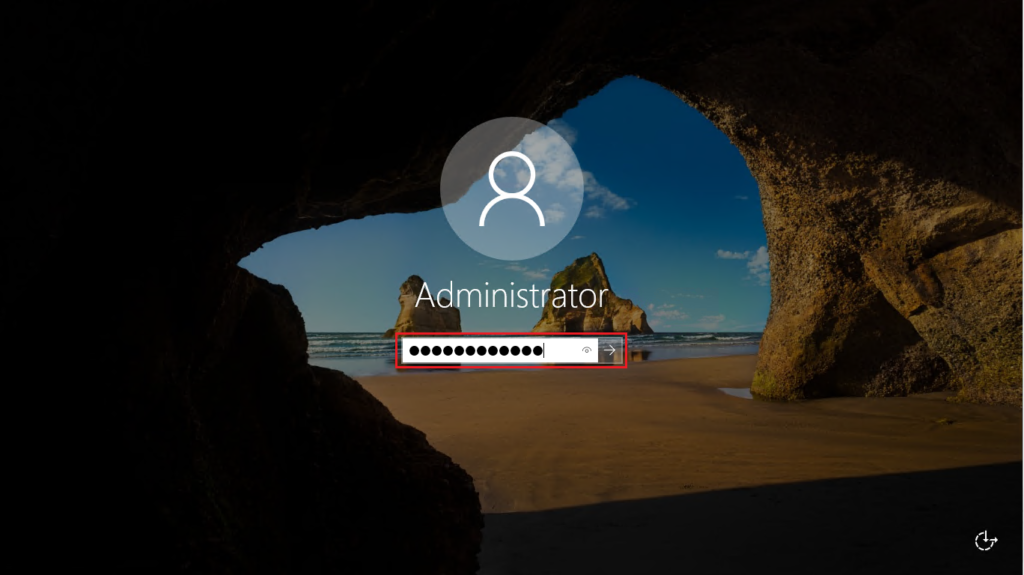
(10) ビルトインAdministratorのパスワードを入力して、[完了]をクリックします。
(11) 設定したAdministratorアカウントでサインインします。
初期設定
ネットワーク設定(固定IPアドレス)
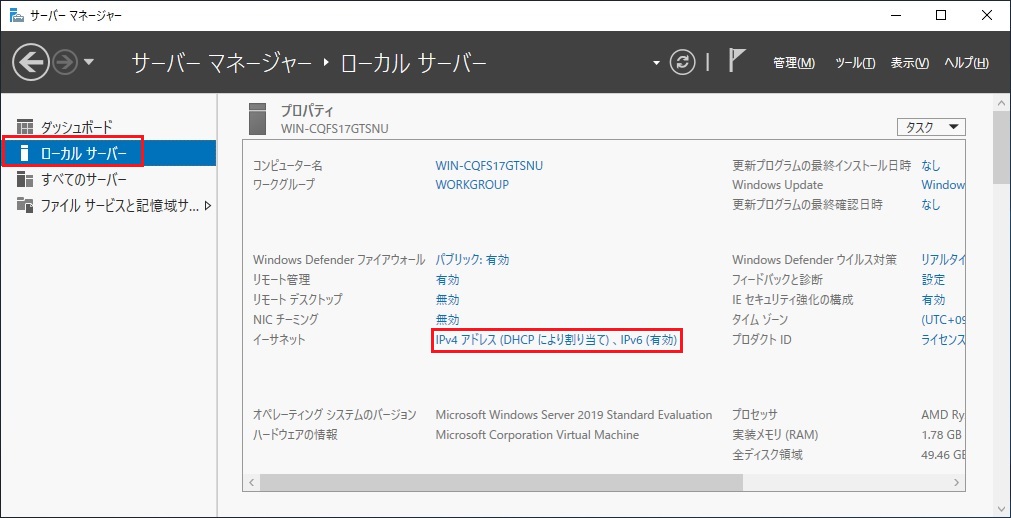
(1) [サーバー マネージャー] – [ローカルサーバー] を選択し、[イーサネット]の[IPv4 アドレス…]をクリックします。
※現在は、DHCPにより動的IPアドレスが割り当てられています。
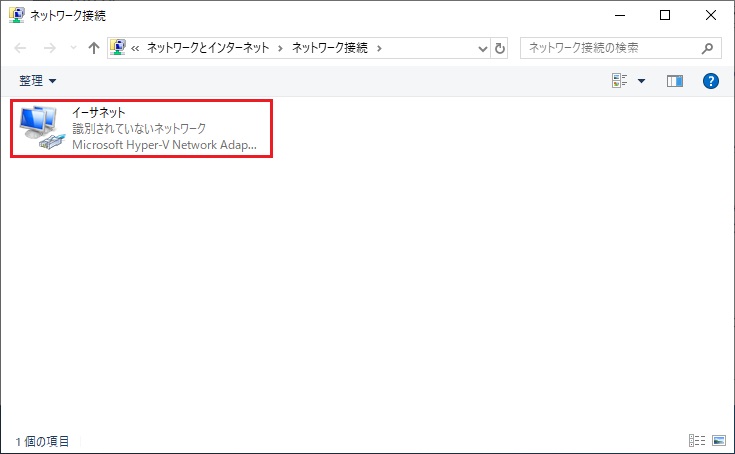
(2) [イーサネット]アダプタをクリックします。
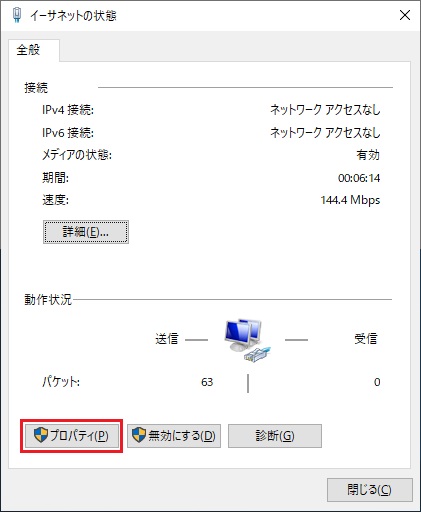
(3) [プロパティ]をクリックします。
(4) [インターネット プロトコル バージョン 4(TCP/IPv4)]を選択して、[プロパティ]をクリックします。
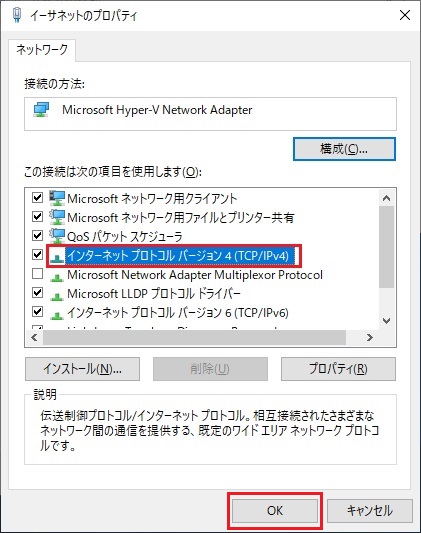
(5) [次のIPアドレスを使う]を選択して、ネットワーク設定を入力後、[OK]をクリックします。

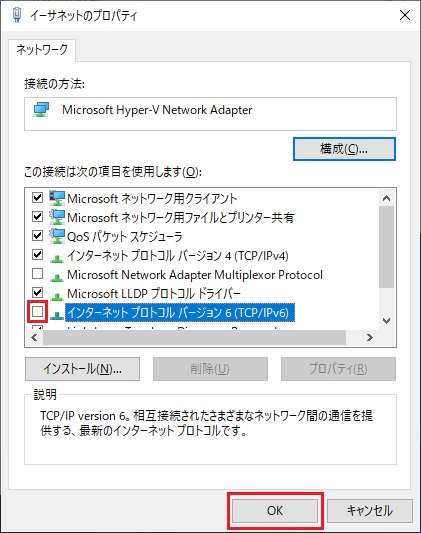
(6) [インターネット プロトコル バージョン6(TCP/IPv6)]のチェックを外して、[OK]をクリックします。
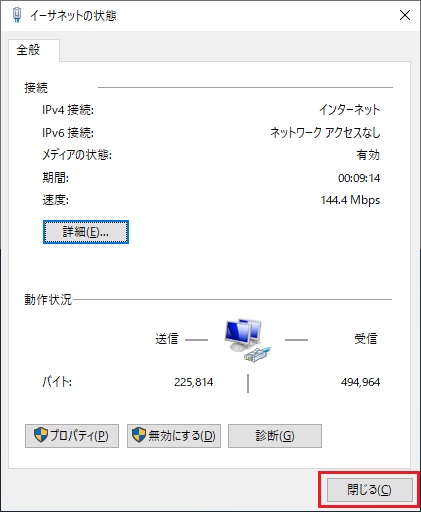
(7) [閉じる]をクリックします。ネットワーク設定は以上です。
コンピューター名(ホスト名)の設定
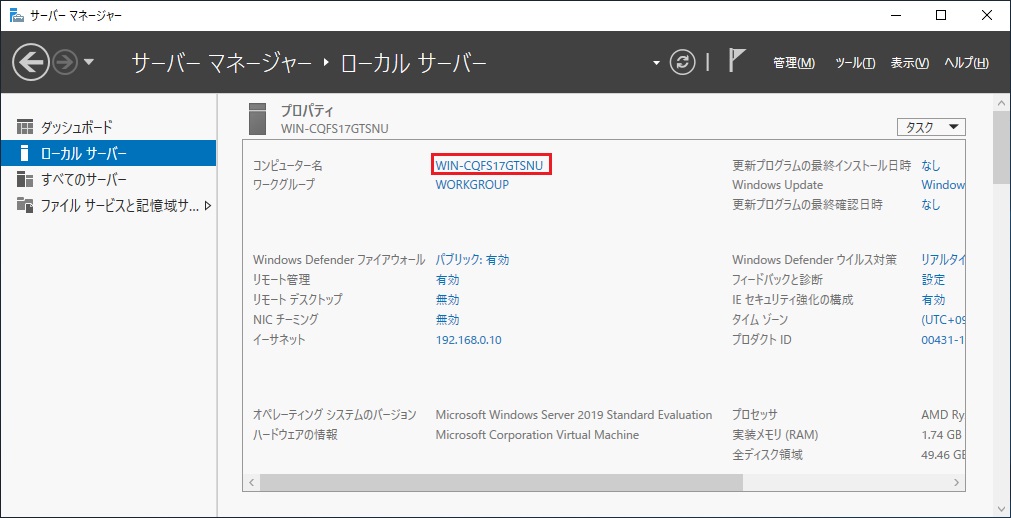
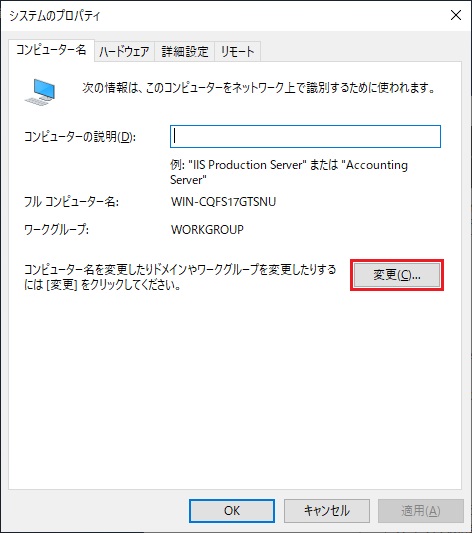
(1) [サーバー マネージャー] – [ローカルサーバー]を選択し、[コンピューター名]の[<コンピュータ名>]をクリックします。
(2) [変更]をクリックします。
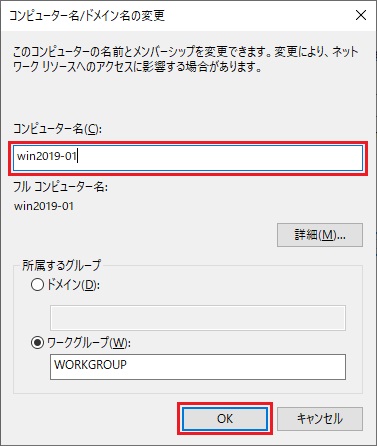
(3) [コンピューター名]を入力して、[OK]をクリックします。
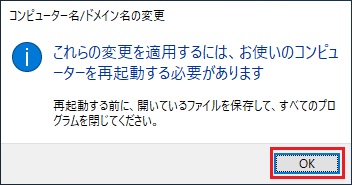
(4) [OK]をクリックします。
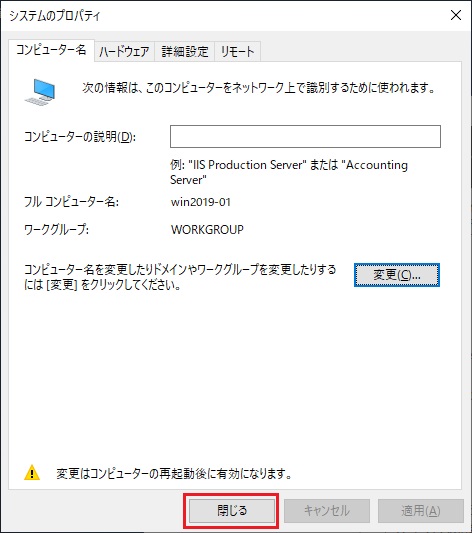
(5) [閉じる]をクリックします。
(6) [今すぐ再起動する]をクリックします。
※注:即座にOSが再起動されます。

リモートデスクトップの有効化
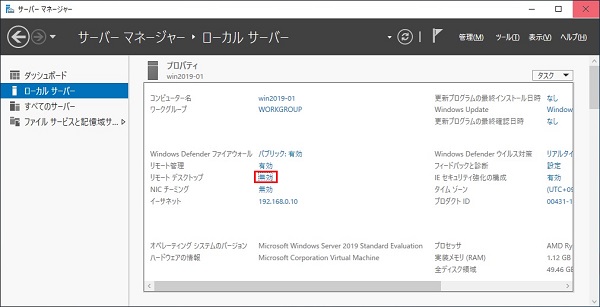
(1) [サーバー マネージャー] – [ローカルサーバー]の [リモートデスクトップ]の[無効]をクリックします。
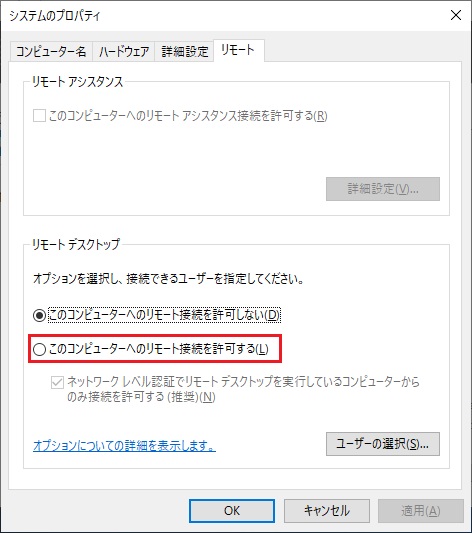
(2) [このコンピューターへのリモート接続を許可する]を選択します。
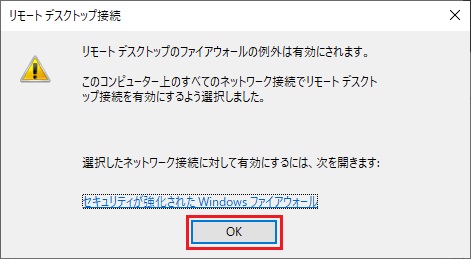
(3) [OK]を押下します。
※Windowsファイアウォールの設定が変更されて、リモートデスクトップの通信が許可されます。
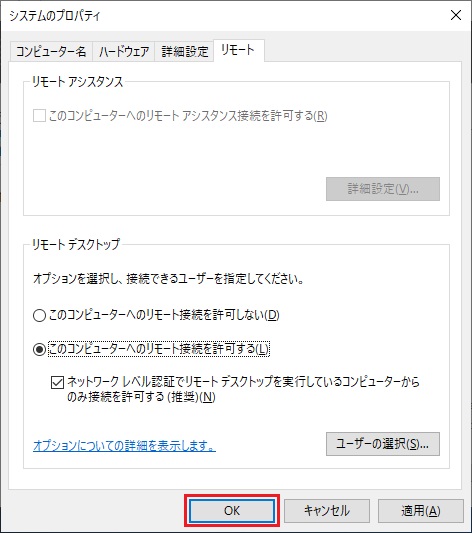
(4) [OK]をクリックします。リモートデスクトップの設定は以上です。
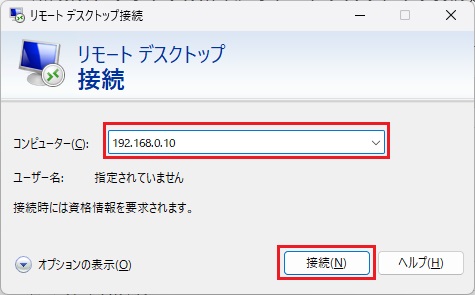
(5) Windowsのクライアントでリモートデスクトップツールを開き、対象サーバのIPアドレスを入力して[接続]をクリックします。
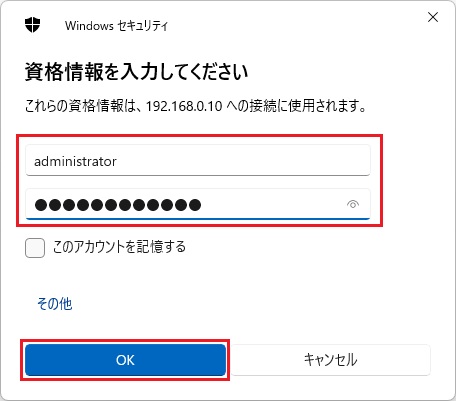
(6) 対象サーバのアカウントを入力して、[OK]をクリックします。
(7) [このコンピューターへの接続について今後確認しない]にチェックを入れて、[はい]をクリックします。
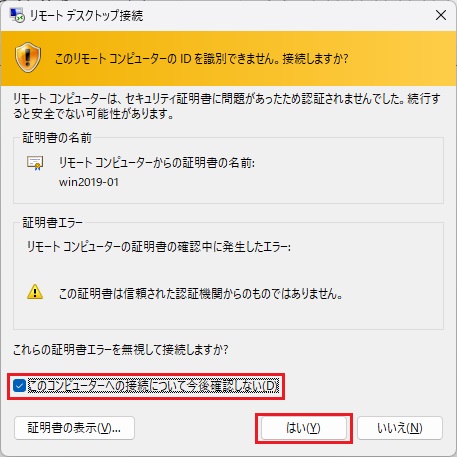
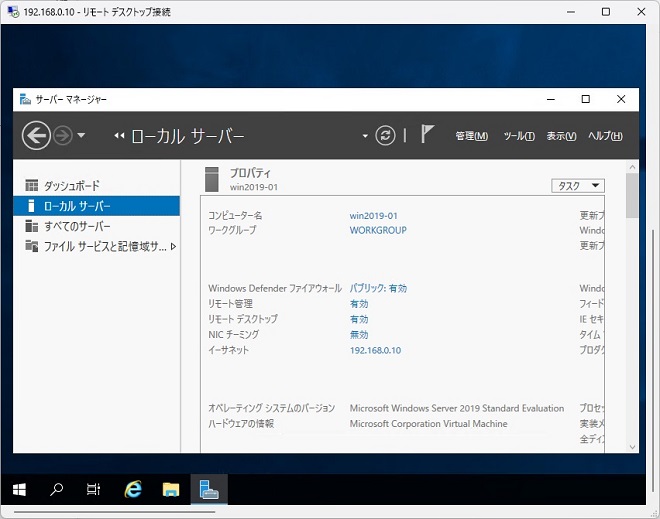
※リモートデスクトップの接続できれば完了です。
Windows Updateの実行
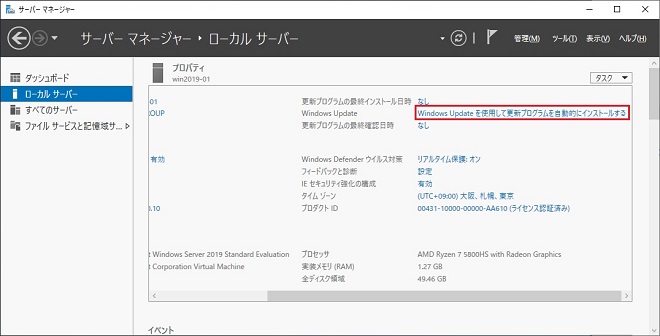
(1) [サーバー マネージャー] – [Windows Update]の[Windows Update を使用して更新プログラムを…]をクリックします
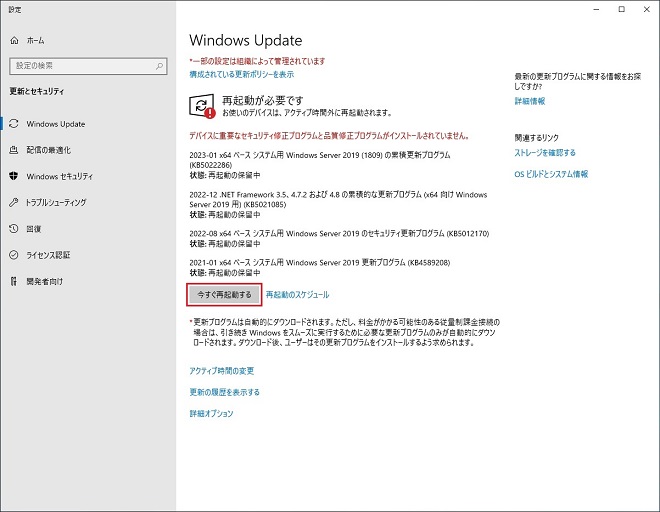
(2) [今すぐインストール]をクリックします。

(3) [今すぐ再起動する]をクリックします。
ライセンスの有効期限確認
(1) コマンドプロンプトで次のコマンドを実行し、有効期限を確認します。
> slmgr /xpr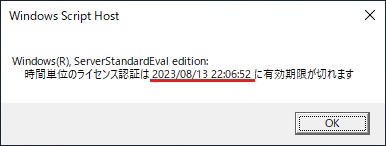
(2) 残りのライセンス認証タイマーをリセット回数の確認は、次のコマンドを実行します。
> slmgr /dlv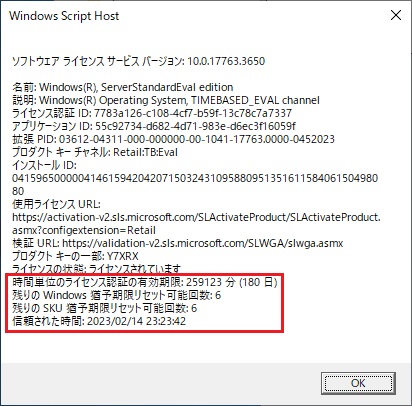
※ライセンス認証タイマーをリセットする場合
次のコマンドを実行します。コマンド完了後、[OK]をクリックして、OSを再起動します。
> slmgr /rearm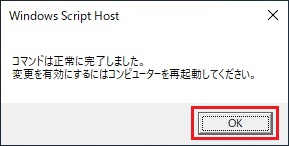
あとがき
次回、このWindows Server 2019(試用版)にActive Directoryの役割を追加して各種検証を進めていきたいと思います。


コメント